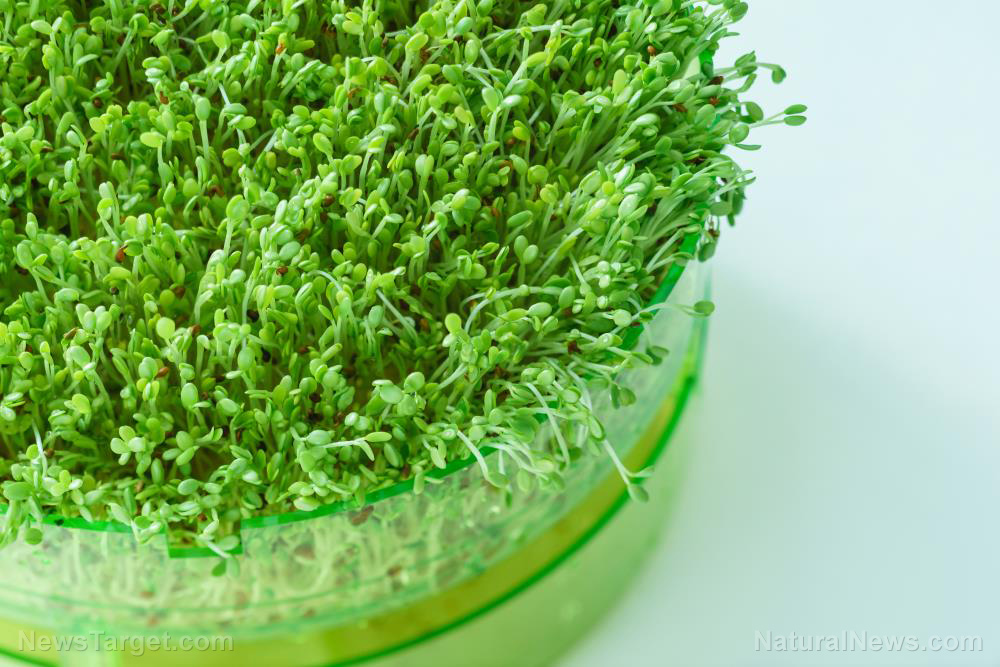
Powerful, inexpensive nutrition at home: Microgreens are easy to grow
08/07/2019 / By Zoey Sky

Fresh fruits and vegetables are full of nutrients that keep you healthy. But did you know that microgreens also have incredible nutritional profiles?
Microgreens are young vegetable greens first introduced to the Californian restaurant scene in the 1980s. These aromatic greens, also called “micro herbs” or “vegetable confetti,” are full of flavor.
Microgreens are about one to three inches (2.5 to 7.5 centimeters) tall. They may be several times smaller than regular vegetables, but microgreens are rich in nutrients. They are also available in various colors and textures. (Related: Mighty microgreens: young vegetables found to be full of minerals.)
Microgreens are somewhere between a sprout and a baby green. But unlike sprouts, microgreens have leaves. While sprouts have a shorter growing cycle of two to seven days, microgreens can be harvested seven to 21 days after germination or after their first true leaves emerge.
Like baby greens, only the stems and leaves of microgreens are considered edible. Microgreens can be bought whole and cut at home so you can keep them alive until they are consumed. Microgreens can be grown outdoors, in greenhouses, or on a windowsill.
Microgreens may have more nutrients than fully grown leafy greens
Several studies suggest that, compared to mature vegetables, microgreens may have a superior antioxidant vitamin and mineral profile .
In a study published in the Journal of Agricultural and Food Chemistry, scientists measured the concentrations of the following vitamins in 25 commercially available microgreens:

- Ascorbic acid (vitamin C)
- Carotenoids (vitamin A)
- Phylloquinone (vitamin K1)
- Tocopherols (vitamin E)
They found that some microgreens have higher nutritional densities than fully grown leaves. For instance, they found the highest concentration of vitamin K1 in garnet amaranth, followed by red sorrel, green basil, pea tendrils, and red cabbage. The amounts of vitamin K1 in these microgreens were higher than the amounts found in mature vegetables.
Both red cabbage and garnet amaranth microgreens had the highest concentrations of vitamin C, followed by China rose radish, opal basil, and opal radish. In fact, the concentration of vitamin C in red cabbage microgreens was 2.4 times greater than the estimated average requirement (EAR).
Red sorrel had the highest beta-carotene (provitamin A) concentration, followed by cilantro, red cabbage, and peppercress.
Meanwhile, green daikon radish had very high levels of alpha- and gamma-tocopherol (vitamin E). Cilantro, opal radish, and peppercress microgreens also proved to be better sources of alpha- and gamma-tocopherol than mature spinach leaves.
Microgreens and sustainability
Unlike fully grown produce, microgreens have a gentler impact on the environment.
In the U.S., food production uses 50 percent of the total land. It also accounts for 80 percent of total freshwater consumption. Additionally, agricultural soil management is a major contributor to nitrous oxide (N2O) emissions and pesticide use.
In a separate study published in the journal Frontiers in Nutrition, scientists conducted a systematic comparison of the environmental impact of broccoli microgreen cultivation methods and mature broccoli cultivation methods. The researchers also compared the nutritional profiles of the two types of greens.
Results showed that broccoli microgreens require about 158 to 236 times less water than nutritionally equivalent mature vegetables. Microgreens also take 93 to 95 percent less harvesting time and do not require the use of harmful fertilizers or pesticides.
No matter how they were grown, microgreens had greater quantities of copper, magnesium, manganese, and zinc than mature broccoli. Compost-grown microgreens also had higher levels of calcium, copper, iron, magnesium, manganese, phosphorus, potassium, sodium, and zinc.
How to grow your own microgreens
You can save money by growing your own microgreens at home. When buying seeds, look for organic, non-GMO seeds at health food shops or online stores.
Follow the steps below to cultivate microgreens at home.
- Pre-soak larger seeds in warm water for a few hours or overnight for quicker germination.
- When using a tray, lay some moistened paper towel or cloth at the bottom. Fill the container at least 3/4 full of a moist growing medium (one inch deep).
- Scatter the seeds over the soil and gently press them in.
- Mist with a spray bottle to water the seeds lightly.
- Place the drainage tray or container in a warm spot, such as near a window with sunlight.
- Mist the seeds every day as needed. You can check soil moisture by touching it with your fingers.
- Create a warm, humid environment for the seeds to germinate by covering the seeds with a lid or add a clear plastic bag over the top of the tray. Don’t let the lid or plastic touch the plants and cut some holes in the material for airflow.
Microgreens can be harvested after several weeks, depending on the variety. When the seedlings are one to three inches tall, your microgreens are ready. Use scissors to cut the stems just above the soil when harvesting.
Improve your overall health by adding microgreens to your diet to boost your intake of important vitamins and minerals.
Sources include:
Submit a correction >>
Tagged Under:
#nutrition, botanicals, clean food, DIY, fresh vegetables, functional food, GMO Free, how-to, ingredients, microgreen cultivation, microgreens, minerals, natural cures, natural health, organics, prevention, proper nutrition, vitamin A, vitamin C, vitamin E, vitamin K1
This article may contain statements that reflect the opinion of the author


